Recently, PosterSpy partnered up with Workflow — a new task management tool for creatives. PRO members get a premium Workflow plan (typically worth £10 per month) entirely for free. Simply click the link on the PRO dashboard.
But what is Workflow and what makes it different from other task management apps? Let’s take a closer look in our Workflow basics guide.
“Simplicity is the ultimate sophistication.” ― Clare Boothe Luce
Workflow was built by creatives, for creatives, around one principle: simplicity. Too often task management tools overwhelm their users with extraneous options and visual clutter. Workflow is nothing like that. The platform is designed to be minimalist and unobtrusive and to stay out of your way as much as possible.
Handle projects, review work, and leave and get feedback directly in Workflow, instead of across multiple platforms. Focus on creating, and let the management happen in the background!
The world at your fingertips
One of Workflow’s most appealing points is its ease of navigation. Everything important — from your inbox to the projects tab — is accessible at the click of a key (or two). Try it —it’s so much faster than using a mouse!
Here are some keyboard shortcuts to get you started:
- To create a project, just hit Ctrl + PC on Windows, or Cmd + P on Mac.
- To create a task within the project, simply press ‘C‘.
- Want to change a task’s status? Use ‘S’ in it.
- G + I takes you to your Inbox. (The ‘G,’ of course, is for ‘go.’)
- G + P takes you to Projects.
- Finally, Ctrl + K on Windows or Cmd + K on Mac opens the command bar. You can use it to find out the shortcuts you don’t know or remember.
Getting started
Let’s walk you through the basics of project management in Workflow.
To get things going, hit Ctrl + P (or Cmd + P) to create a project.
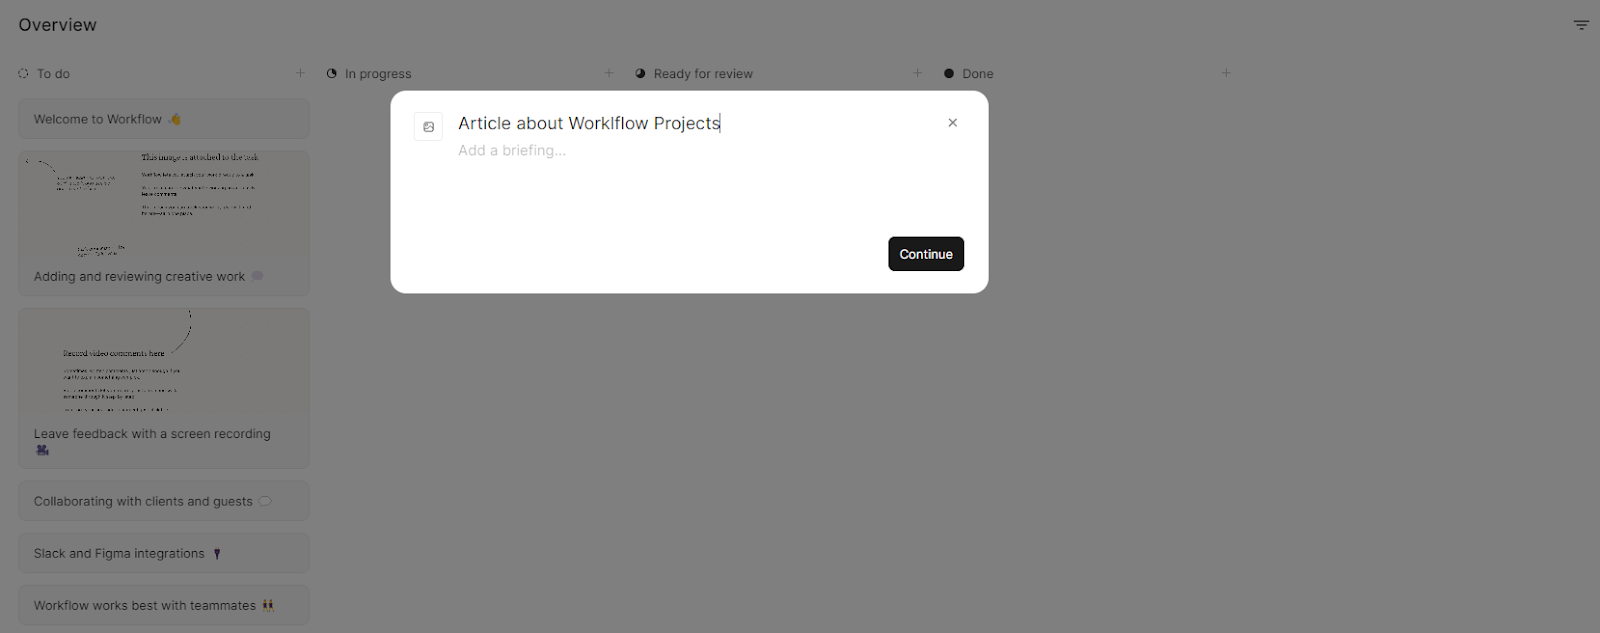
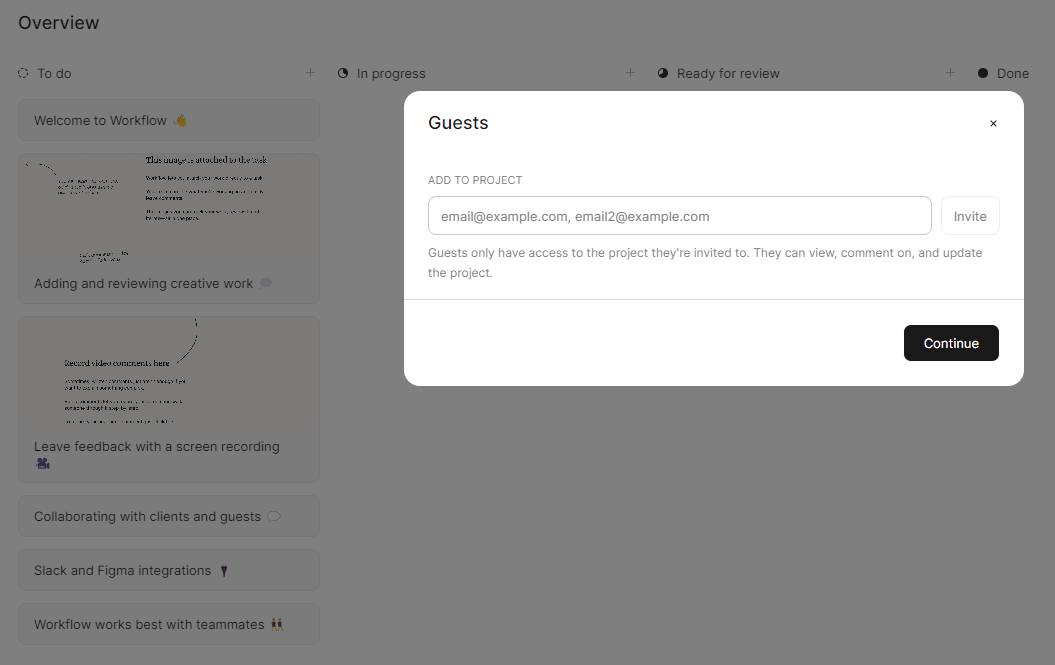
In the pop-up window, you can write down a name and description for the project, as well as invite teammates and guests to work with you on it. The term ‘team member’ is self-explanatory. As for guests, they can view, comment on, and edit tasks and assets within a project — but don’t have access to anything else.
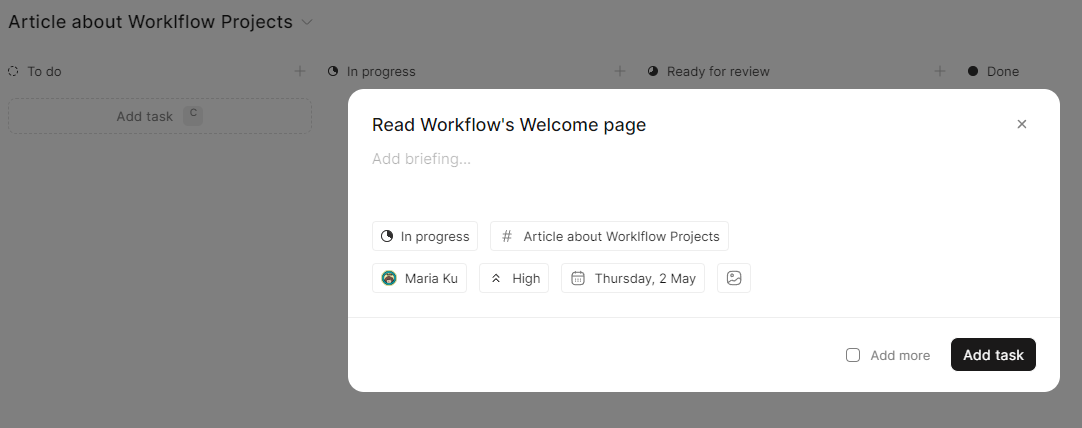
Now that you have your project at the ready, time to populate it with some tasks! Press ‘C’ to create your first task. In the pop-up window you can set the task’s title, priority, status, and due date, as well as assign the task to a team member or guest:
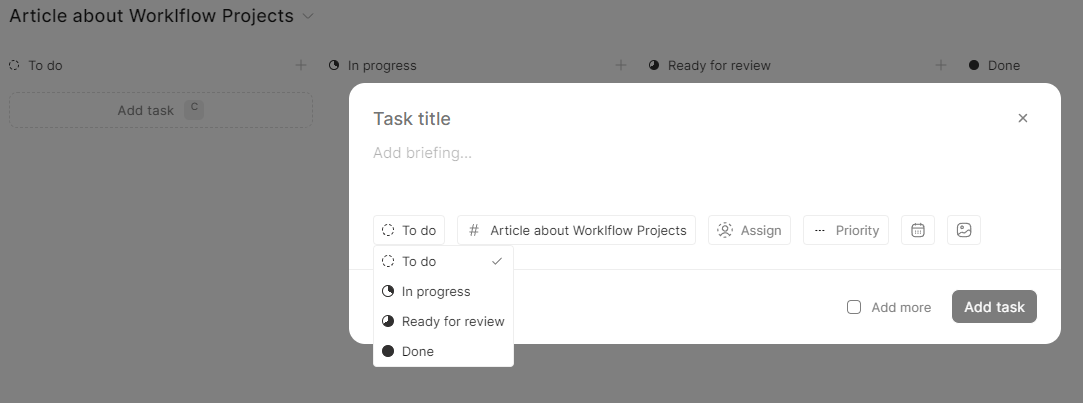
Like so!
Once the task has been created, you can click on it to get redirected to its page, where you will be able to get a closer look at all the dates, media and comments connected to it:

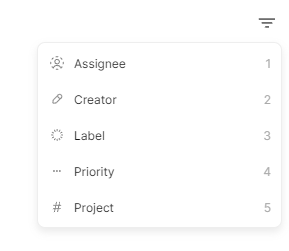
Finally, in the upper right corner, clicking the hamburger lets you filter tasks by creator, assignee, label, and other metrics:
And this is it for a quick tour of Workflow’s basic capabilities and interface. See you next time for an in-depth look at some of the app’s more unique features!
Take a look at Workflow’s changelog to see all of their new updates.
The future of creative project management. Skip the waitlist and claim your free premium account, exclusive for Posterspy PRO members.